Umbraco 11 Block Grid Editor
Umbraco 11 Block Grid Editor is a powerful tool that provides several benefits for website developers and editors. Here are some reasons why it's considered good:
-
User-Friendly: The block grid editor provides a user-friendly interface that allows editors to create and manage content with ease. The editor provides a simple drag-and-drop interface that lets editors easily arrange and configure content blocks.
-
Flexible: The block grid editor is incredibly flexible, allowing editors to create complex layouts quickly. Editors can add new content blocks to a page, customize the layout, and even create custom blocks if necessary.
-
Responsive: With the block grid editor, editors can easily create responsive layouts that work on any device. The editor provides an intuitive way to manage breakpoints, allowing editors to adjust the layout for different screen sizes.
-
Modular: The block grid editor promotes a modular approach to content creation, where editors can create reusable content blocks that can be used across multiple pages. This approach makes it easier to maintain consistency across the website and reduces the amount of work required to create new pages.
-
SEO-Friendly: The block grid editor provides excellent support for search engine optimization (SEO). Editors can easily add metadata, alt text, and other SEO-related information to their content blocks, helping to improve the website's search engine rankings.
Overall, the block grid editor in Umbraco 11 is a powerful and flexible tool that makes it easier for editors to create and manage content on their website.
We add support for Umbraco 11 block editor to our OSKI starter kit and here is quick example how it can be used:
How to Use the Block Grid Editor
Using the Block Grid Editor in Umbraco 11 is easy and intuitive. Here are the basic steps:
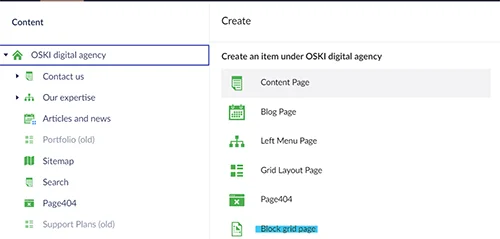
Step 1: Create a new page in Umbraco and open it in the back end editor.


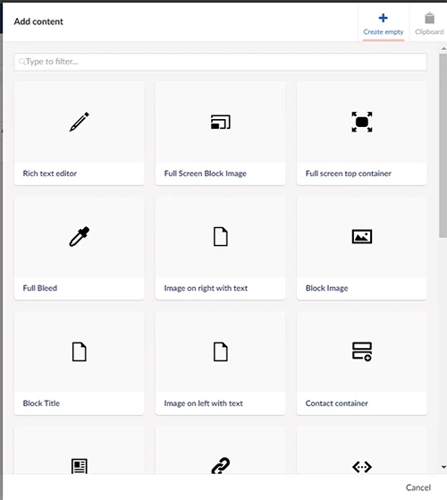
Step 2: Press on "Add content" button and choose a block that you want to add.

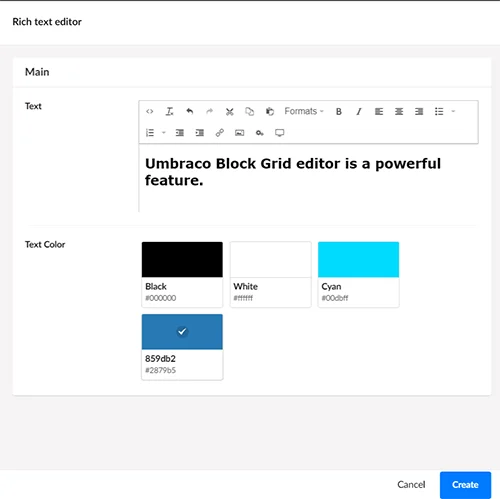
We will take "Rich text editor" as an example.

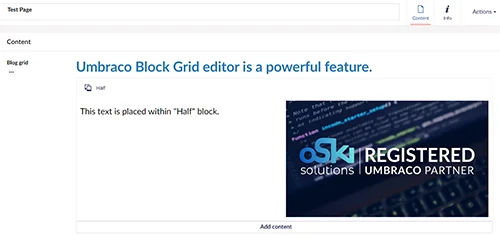
Then we will add "Half" block and add "Rich text editor" and "Block Image" as its content. And after a few seconds we have the following result:

Step 3: Fill each cell with your desired content, using any of the available content elements.
Step 4: Customize the layout of your grid by adjusting the width and height of each block, as well as the padding and margins between the blocks.
Step 5: Preview your grid and make any necessary adjustments.
Step 6: Publish your page and enjoy your custom grid layout!
Just try OSKI starter kit with implemented block grid editor.

