
How to install OSKI Starter Kit for Umbraco 11

In our previous article, we provided an overview of the OSKI starter kit for Umbraco 11, highlighting its usefulness as a top free solution for small and medium-sized businesses. We delved into the features and benefits you can expect from this starter kit. In this article, we will walk you through the process of obtaining and installing the OSKI Starter Kit for Umbraco 11.
You will need to have Visual Studio installed on your computer. Once you have these prerequisites in place, you are ready to commence the OSKI Starter kit installation.
Step 1: Open the Command Prompt Launch the Command Prompt application on your computer to prepare for the installation process.
Step 2: Execute the installation command.
Copy and paste the following command into the Command Prompt window to install all necessary components:
dotnet new -i Umbraco.Templates && dotnet new sln --name "MySolution" && dotnet new umbraco --force -n "MyProject" --friendly-name "Administrator" --email "admin@example.com" --password "1234567890" --connection-string "server=.SQLEXPRESS;database=myDatabase;user id=myUser;password="myPassword"" --connection-string-provider-name "Microsoft.Data.SqlClient" && dotnet sln add "MyProject" && dotnet add "MyProject" package clean && dotnet add "MyProject" package OskiStarterKit && dotnet run --project "MyProject"
In this command you can specify your Umbraco's backoffice credentials, your connection string and you project and solution names accordingly.
Step 3: After you have started project, you can navigate to "Settings" section. There you will find "SMTP Configration" tab. You will see default values for SMTP configuration.
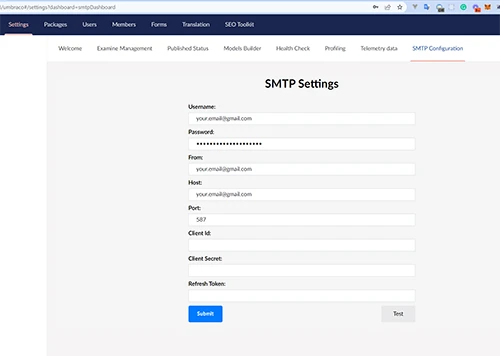
In this section you can configure your SMTP settings and submit them, using "Submit" button.
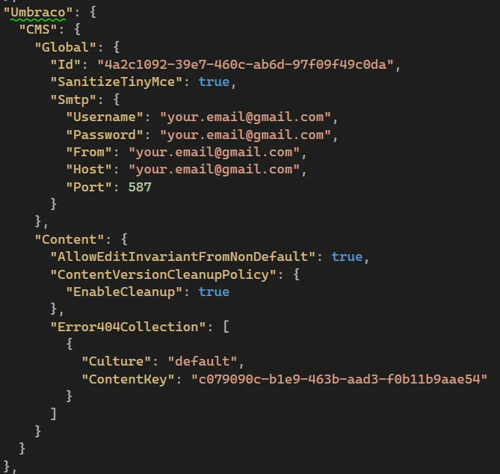
Step 4: Configure error page settings Locate the appsettings.json file and look for the "Content" section. Here, you will find the settings for the Error page:
"Error404Collection": [
{
"Culture": "default",
"ContentKey": "c079090c-b1e9-463b-aad3-f0b11b9aae54"
}
]
Step 5. Enjoy using our solution!
We hope the installation of our OSKI Starter kit went smoothly and you did not experience any difficulties. However, in case you have any questions do not hesitate to contact us. At OSKI Solutions we are always glad to cooperate with you in finding the best solutions for your business.